
It’s 92 degrees out. You open the fridge. Nothing cold. You stare at your coffee maker and feel actual disappointment.
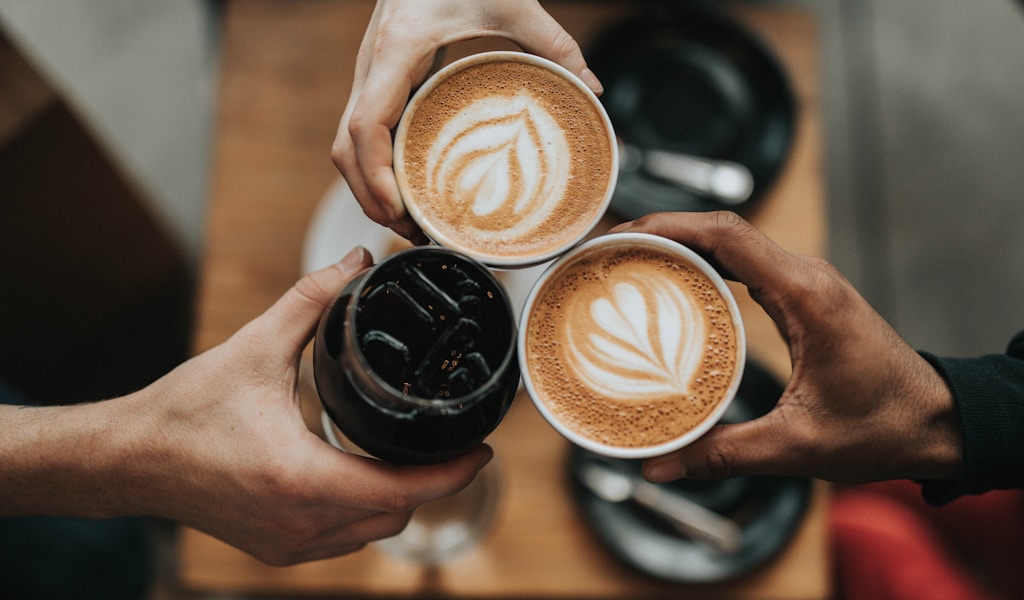
Hot coffee in July tastes like a mistake. But iced coffee from the café? Five bucks a cup. Do that every morning and you’re burning $150 a month on something you could make at home for pennies.
And the “iced coffee” you tried making – dumping hot brew over ice cubes – came out watery, bitter, and sad. You dumped it down the sink after two sips.
There’s a better way. It’s called cold brew. Not iced coffee. Not a hurried pour-over on the rocks. Cold brew is steeped in cold water for half a day or more. No heat touches the grounds. The result? Coffee that’s smooth as chocolate milk, naturally sweet, and strong enough to wake up your ancestors.
I’ve been making cold brew at home for seven summers now. I’ve tried every ratio, every steep time, every filter method. I’ve messed up batches so bitter they made my eyes water. I’ve also made batches so good my friends asked if I’d started selling it.
This guide covers everything. The exact gear you need (and what’s a waste of money). The step-by-step method that works every time. How to dilute it so it’s actually drinkable. Which beans to buy. And the mistakes that ruin perfectly good coffee.
No fluff. No “coffee is life” poetry. Just a cold brew recipe that works.
What You Need to Make Cold Brew Coffee
You need four things. That’s it. Some people will sell you a $80 cold brew system with tubes and valves and a brand name in Helvetica. You don’t need any of that.
1. A Container
Literally anything that holds liquid. A mason jar. A French press. A plastic pitcher. A soup pot if that’s what you’ve got. Glass is best because it won’t absorb odors, but you do you.
The size matters more than the material. A 32-ounce (1-liter) container makes about 16 ounces of drinkable cold brew after dilution. That’s two generous glasses or four smaller servings. Scale up or down from there.
If you want a dedicated system, cold brew makers on Amazon start around $15. The Takeya Cold Brew Maker is the one I’ve used for three years. The mesh filter is fine enough that you skip the whole straining step. But again – a mason jar and a sieve work just fine.
2. Coarse Ground Coffee
This is the one rule you can’t break. Coarse grind only. Think sea salt texture. Not powder. Not sand. Sea salt.
Fine grounds over-extract in 24 hours and turn your cold brew into battery acid. They also clog filters so badly you’ll be straining for 20 minutes while questioning your life choices.
If you grind at home, set your burr grinder to its coarsest setting – the one labeled “French press” or “cold brew.” Blade grinders are a gamble because they create uneven particles, but if that’s what you’ve got, pulse in short bursts and shake between pulses.
No grinder? Most roasters will grind for you. Just ask for “coarse grind for cold brew” at checkout. Whole Foods and Trader Joe’s also sell pre-ground beans labeled “coarse” or “French press grind.”
3. A Filter or Strainer
You’ll need something to separate grounds from liquid after steeping. Options ranked easiest to most annoying:
- Nut milk bag or cheesecloth – Best option. Dump it in, squeeze it out. No clogging.
- Fine mesh strainer – Works but lets some sediment through. Double up for cleaner results.
- Paper coffee filter – Cleanest brew but painfully slow. Only use if you’re patient.
- French press plunger – Already built in. Just press and pour.
- Dedicated cold brew maker – Removable filter basket. Dump grounds, done.
4. Time
12 to 24 hours. No shortcuts. Cold water extracts flavor slowly – that’s the whole point. Less than 12 hours and your brew will taste like vaguely brown water. More than 24 hours and you cross into bitterness territory.
I start mine at 6 PM on a Friday and strain it at 10 AM Saturday. That’s 16 hours. Works every time.
How to Make Cold Brew Coffee: Step-by-Step
Here’s the method. It works. Don’t overthink it.
Step 1: Measure Your Coffee and Water
The ratio is 1 part coffee to 4 parts water by weight. This makes a concentrate – strong enough that you dilute it later. Don’t skip the concentrate approach. Brewing ready-to-drink strength means a weaker, less flavorful result.
By weight (recommended):
- 100 grams coffee → 400 grams water (makes ~2 servings)
- 200 grams coffee → 800 grams water (makes ~4 servings)
- 340 grams (12 oz bag) coffee → 1360 grams water (makes a week’s worth)
By volume (if you don’t have a scale):
- 1 cup coffee grounds → 4 cups water
Use a kitchen scale if you have one. Coffee-to-water ratios get weird when you eyeball them. A “cup” of grounds can weigh anywhere from 70 to 100 grams depending on grind size and bean density.
Want a stronger concentrate? Go 1:3. Want something milder straight out of the jug? Go 1:5. But 1:4 is the sweet spot for most people.

Step 2: Combine Coffee and Water
Dump the grounds into your container. Pour the cold water over them. Use filtered water if your tap water tastes like a swimming pool – cold brew won’t hide bad water the way hot coffee does.
Stir gently until all the grounds are wet. You’ll see some float to the top. That’s normal. You don’t need to submerge them perfectly.
Cover the container. A lid, plastic wrap, a plate – whatever keeps dust and fruit flies out. It doesn’t need to be airtight.
Step 3: Steep at Room Temperature
Leave it on the counter. Room temperature. 12 to 24 hours.
Some people steep in the fridge. You can do that, but it takes longer – 18 to 24 hours minimum – because cold temperatures slow extraction. Room temperature gives you a fuller, richer brew in less time. There’s zero food safety risk here. Coffee’s natural antimicrobial properties plus the extended steep time make spoilage a non-issue. I’ve left cold brew on the counter for 30 hours and it was fine.
Steep time guide:
- 12 hours – Lighter, brighter, more acidity. Good if you miss the “coffee” bite.
- 16 hours – Balanced. Smooth with a hint of brightness. My preference.
- 20 hours – Dark, rich, chocolatey. Almost no acidity.
- 24 hours – Maximum strength. Can taste slightly bitter if your beans are dark roast.
Step 4: Strain the Brew
This is the only annoying part. Set up a second container and pour the mixture through your filter of choice.
If using a nut milk bag: pour everything in, then squeeze the bag like you’re milking a very stubborn almond. Get every drop. Your forearms will get a workout.
If using a mesh strainer: pour slowly. When it clogs, tap the side or stir gently with a spoon. Don’t push grounds through – that releases bitterness.
If using paper filters: line a sieve with the filter, set it over your container, and walk away for 15 minutes. It’ll drip through eventually. Change filters if the first one clogs completely.
French press users: just press the plunger down slowly. Pour carefully – the last inch will be sludge. Toss that part.
You now have coffee concentrate. It looks like used motor oil and smells like heaven. Transfer it to a bottle or jar with a lid.
Step 5: Refrigerate
Strain into a clean container, seal it, and stick it in the fridge. The concentrate stays good for up to two weeks. It’ll be strongest in the first 5 days, then gradually lose punch.
Pro move: pour the concentrate into an ice cube tray and freeze it. Cold brew ice cubes. Now when you pour cold brew over ice, it doesn’t get watered down. Your future self will thank you.
The Dilution Guide: How to Actually Drink It
Remember – what you just made is concentrate. Drink it straight and you’ll vibrate through walls. You need to dilute it.
The standard dilution is 1 part concentrate to 1 part liquid. That means equal amounts. Half a cup of concentrate, half a cup of water or milk. Pour over ice. Done.
But there are better options than plain water:
- Water (still or sparkling) – Clean, classic. Sparkling water adds a weirdly pleasant fizz that feels like a coffee soda.
- Whole milk – Creamy, rich, breakfast in a glass. My go-to.
- Oat milk – Sweeter than dairy milk. Pairs incredibly well with cold brew’s chocolate notes.
- Almond milk – Lighter option. Use the unsweetened kind unless you want dessert.
- Coconut milk – For when you want your coffee to taste vaguely like a beach vacation.
- Cream or half-and-half – Luxurious. One splash is enough.
- Sweetened condensed milk – Vietnamese-style. Dangerous. Delicious.
Start with 1:1 and adjust. Some people go 1:2 (weaker), some go 2:1 (stronger). There’s no wrong answer – drink coffee that tastes good to you.
Dilution by the numbers:
| Dilution Ratio | What You’re Making | Tastes Like |
|---|---|---|
| 1:2 (concentrate to liquid) | Light cold brew | Mild, tea-like, easy drinking |
| 1:1 | Standard cold brew | Bold, smooth, balanced |
| 2:1 | Strong cold brew | Intense, espresso-adjacent, wakes the dead |
| 1:1 with milk | Cold brew latte | Creamy, sweet, luxurious |
Cold Brew Methods Compared: Immersion vs. Japanese Iced vs. Kyoto Drip
Not all cold coffee is cold brew. Here’s how the methods actually differ.
Immersion Cold Brew (What This Guide Teaches)
Grounds sit in cold water for 12-24 hours. No heat involved. The slow extraction pulls out sugars and oils while leaving behind most of the bitter compounds that hot water releases.
Result: Smooth, sweet, low-acid, heavy body. Tastes almost chocolatey with the right beans. Caffeine content is high because of the long steep time and high coffee-to-water ratio in the concentrate.
Best for: People who hate bitter coffee. People with sensitive stomachs. Anyone who wants to make a big batch once and drink it all week.
Japanese Iced Coffee (Flash Brew)
This is NOT cold brew. Japanese iced coffee is hot-brewed coffee dripped directly onto ice. You brew a pour-over at double strength with half the water, and the other half of the water weight is ice in the carafe waiting to catch the hot coffee.
Result: Bright, acidic, aromatic. Tastes like hot coffee that’s cold – because that’s exactly what it is. The flash cooling locks in volatile aromatics that cold brew loses during the long steep.
Best for: Single-origin light roasts. Fruity Ethiopian beans. People who actually like the acidic notes in coffee and don’t want them smoothed away.
Downside: You have to brew fresh every time. No making a big batch on Sunday. It also requires a pour-over setup and some technique.
Kyoto-Style Slow Drip
The show-off method. Ice water drips one drop at a time through a tower of coffee grounds over 8 to 16 hours. The result is somewhere between immersion cold brew and Japanese iced – smooth like cold brew but with more clarity and brightness.
It’s also wildly impractical for home use. A proper Kyoto dripper costs $200+. It makes about 4 cups per batch. And you have to babysit the drip rate. Unless you’re opening a specialty café, skip it.
| Method | Brew Time | Acidity | Body | Best Bean Roast |
|---|---|---|---|---|
| Immersion Cold Brew | 12-24 hrs | Very low | Heavy, syrupy | Medium to Dark |
| Japanese Iced | 3-5 minutes | Medium-high | Light, crisp | Light to Medium |
| Kyoto Drip | 8-16 hrs | Low | Medium, clean | Medium |
Best Beans for Cold Brew Coffee
Cold brew changes how coffee tastes. Beans that taste bright and fruity as hot coffee often taste flat and one-note as cold brew. The long steep and low temperature mute acidity and amplify sweetness and body.
What works best:
Roast Level: Medium to Medium-Dark
Dark roasts work but can taste one-dimensional – just bitter and roasty with nothing else. Light roasts lose their best characteristics (floral notes, acidity) during the long steep and just taste thin.
Medium roasts hit the sweet spot. You get chocolate, caramel, nuts – all the flavors that survive and thrive in cold extraction. Medium-dark roasts add body and richness without crossing into burnt territory.
Origin: Central and South America
Colombian, Brazilian, and Guatemalan beans are the cold brew MVPs. They’re naturally chocolatey, nutty, and low in acidity. These flavors amplify during cold steeping instead of disappearing.
African beans (Ethiopian, Kenyan) are trickier. Their citrus and berry notes can turn into something weird after 16 hours in cold water – almost fermented-tasting. Not bad exactly, but not what most people want from cold brew.
Sumatran and Indonesian beans work well for ultra-dark, earthy cold brew. If you like your coffee to taste like it was brewed in a forest, go here.
Pre-Ground vs. Whole Bean
Whole bean, ground right before brewing, always tastes better. But cold brew is forgiving. Pre-ground coffee makes perfectly decent cold brew because the long steep time extracts whatever is left in those grounds.
If you’re buying pre-ground, look for “coarse grind” or “French press” on the label. Avoid espresso grind and anything that looks like powder.
Cost-conscious tip: cold brew is where cheap-ish beans shine. You don’t need a $22 single-origin microlot. A $10 bag of medium-roast Colombian from the grocery store makes killer cold brew. Save the fancy stuff for your pour-over.
If you’re serious about your home coffee setup, check out our guide to the best espresso machines – different tool, equally obsessive hobby.
Cold Brew Flavoring Ideas (Beyond Vanilla Syrup)
Plain cold brew is great. Flavored cold brew is a whole different game. Here are ideas that go past the obvious.
Steep-In Flavors (Add During Brewing)
Throw these into the container with your grounds at the start. They infuse over 12-24 hours alongside the coffee:
- Cinnamon stick – One stick per batch. Warm, subtle, somehow makes coffee taste sweeter without sugar.
- Cacao nibs – 2 tablespoons. Real chocolate flavor without the sweetness. Pairs incredibly with medium-dark roasts.
- Vanilla bean – Split one pod and scrape the seeds in. Toss the pod in too. Real vanilla, not the extract stuff that tastes like alcohol.
- Star anise – One pod. Adds a licorice note. Not for everyone but incredible if it’s your thing.
- Cardamom pods – 3-4 crushed pods. Middle Eastern coffee shop vibes.
- Orange peel – Strips from half an orange. Just the zest, no white pith (the pith makes it bitter).
- Toasted coconut flakes – 2 tablespoons. Tropical, nutty, surprising in a good way.
Post-Brew Add-Ins
Stir these in when you pour a glass:
- Maple syrup – Better than simple syrup. The maple notes blend with coffee’s natural caramel flavors.
- Sweetened condensed milk – Vietnamese cà phê sữa đá style. Stir a tablespoon into your glass before adding ice and cold brew.
- Coconut cream – The thick part from a can of full-fat coconut milk. Turns cold brew into something that should probably be dessert.
- Mint leaves – Muddle a few leaves in the bottom of the glass. Shockingly refreshing on hot days.
- Tonic water – Replace half your dilution water with tonic. Coffee tonic is a thing at fancy cafés and it’s weirdly great – bitter, sweet, bubbly.
Cold Brew Cocktails (Quick Hits)
Cold brew concentrate plays well with alcohol. A few combos worth trying:
- Cold Brew Old Fashioned – 2 oz bourbon, 1 oz cold brew concentrate, 1 tsp maple syrup, dash of orange bitters. Stir over ice.
- Espresso Martini (Cold Brew Version) – 2 oz vodka, 1 oz cold brew concentrate, 1 oz coffee liqueur. Shake hard, strain into a chilled glass.
- Cold Brew & Cola – 1 oz concentrate, cola to fill, ice. Sounds wrong. Tastes right.
Cold Brew Storage Tips: How Long It Lasts & How to Keep It Fresh
You made a big batch. Now keep it from going weird.
How Long Does Cold Brew Last?
In the fridge, in a sealed container: 10 to 14 days for the concentrate.
That’s the honest answer. Some websites will tell you 2 weeks. Others say 7 days. The truth is it depends on how clean your container is and how well it’s sealed. A sterilized glass bottle with an airtight lid? Two weeks easy. An old pasta sauce jar you rinsed out? Maybe 5 days before funky flavors creep in.
Once diluted with water or milk: 3 to 4 days max. The added liquid introduces stuff that goes bad faster. Drink diluted cold brew within a few days.
Signs Your Cold Brew Has Gone Bad
Trust your nose. Fresh cold brew smells like coffee – rich, slightly sweet, maybe chocolatey. Bad cold brew smells sour, musty, or vaguely like a wet dishrag. If you’re unsure, taste a tiny sip. Bad cold brew tastes sharply sour, not pleasantly acidic. Spit it out if you’re not sure – food poisoning from spoiled coffee is rare but not impossible (coffee can grow mold).
Visual cues: any fuzz, film, or cloudy growth on the surface means it’s done. Toss it. Don’t try to save it by scraping off the top.
Best Storage Practices
- Glass over plastic. Glass doesn’t absorb odors or stain. Plastic containers will forever smell like coffee.
- Airtight seal. Oxygen is the enemy. It oxidizes the oils in coffee and turns them stale. Swing-top bottles (the kind with the rubber gasket and metal clamp) are ideal.
- Keep it cold. Don’t leave the bottle on the counter between pours. Pour your glass, return the bottle to the fridge immediately.
- Smaller bottles. Instead of one giant jug, split your batch into two or three smaller bottles. Each one stays sealed until you’re ready to drink it. Less exposure to air.
- Freeze what you won’t drink in a week. Cold brew concentrate freezes beautifully. Pour it into an ice cube tray, freeze solid, then transfer the cubes to a freezer bag. Each cube is roughly 1 ounce of concentrate – thaw a few cubes overnight in the fridge when you want a glass.
Cold Brew Troubleshooting: 5 Common Problems (and Actual Fixes)
“My cold brew is bitter.”
You either steeped too long or ground too fine. Try 14-16 hours instead of 24. Switch to a coarser grind. And check your beans – dark roasts steeped past 18 hours get bitter fast.
“My cold brew is weak and watery.”
You used too little coffee or didn’t steep long enough. Stick to the 1:4 ratio by weight. Don’t shortchange the steep time – less than 12 hours and extraction is incomplete. Also check if you’re accidentally diluting the concentrate before measuring – taste the concentrate straight first to confirm it’s strong enough.
“There’s sludge at the bottom of my glass.”
Your filter isn’t fine enough. After your primary strain, run the brew through a paper filter for a second pass. Or let the finished brew sit in the fridge for an hour – the fines will settle to the bottom. Pour carefully and leave the last half-inch in the bottle.
“My cold brew tastes sour, not bitter.”
Under-extraction. You didn’t steep long enough or your water was too cold (fridge steeping without enough time). Let it go longer next batch – 18-24 hours at room temp. Also check your grind: too coarse and water can’t extract enough.
“Something weird is growing in my cold brew.”
Your container wasn’t clean. Sterilize your bottle with boiling water before filling it. Also: did you leave the brew at room temp for more than 24 hours? In very hot kitchens (85°F+), cold brew can start fermenting after 24 hours. If your kitchen runs hot, steep in the fridge instead.
Cold Brew Equipment Worth Buying (And What to Skip)
I’ve tested a dozen cold brew gadgets. Here’s what’s worth your money.
Worth It
- Takeya Cold Brew Maker – $18-25. The pitcher has a built-in fine mesh filter. Add grounds, add water, steep, remove filter, done. One-piece design, no paper filters, dishwasher safe. This is the one I use.
- OXO Good Grips Cold Brew Maker – $40-50. Uses a “rainmaker” shower head to distribute water over grounds. Produces exceptionally clean brew with almost no sediment. More parts to clean but better results.
- Nut Milk Bag (2-pack) – $7-10. The cheapest upgrade that makes a real difference. So much easier than paper filters. Reusable. Rinses clean in 30 seconds.
- Swing-Top Glass Bottles – $15-20 for a set. Looks good, seals tight, keeps coffee fresh. Way better than reusing a peanut butter jar.
Skip It
- Expensive Kyoto drippers ($150+) – Beautiful but wildly impractical for home. Makes tiny batches. Hard to clean.
- “Cold brew” coffee beans – Marketing. There’s no such thing as a cold-brew-specific bean. Buy any medium-roast you like.
- Electric cold brew makers – These use agitation or mild heat to “speed up” cold brew to 30 minutes. The results taste like bad iced coffee, not cold brew. Skip every one of them.
Browse all cold brew coffee makers on Amazon if you want to compare more options.
Cold Brew Coffee FAQ
Can I heat up cold brew concentrate?
Yes. Dilute it 1:1 with hot water and you’ve got surprisingly smooth hot coffee. The low-acid extraction holds up to reheating. I do this in winter when I want hot coffee but only have cold brew concentrate in the fridge.
Does cold brew have more caffeine than regular coffee?
Depends how you measure it. The concentrate is strong – a straight ounce of concentrate has about as much caffeine as a strong espresso shot. But after you dilute it 1:1, a cup of cold brew has roughly the same caffeine as a cup of hot drip coffee, maybe slightly more. The difference isn’t dramatic enough to worry about unless you’re chugging concentrate straight from the bottle.
Is cold brew less acidic? (And does that matter for acid reflux?)
Yes, measurably less acidic. A 2018 study in Scientific Reports found that cold brew has roughly 70% less titratable acidity than hot-brewed coffee. The compounds that trigger acid reflux – chlorogenic acids and certain organic acids – don’t extract well in cold water.
If hot coffee messes with your stomach, cold brew might not. Plenty of people with GERD and acid reflux report being able to drink cold brew without issues. It’s not a guarantee – everyone’s stomach is different – but it’s worth trying.
Can I use regular pre-ground coffee from the grocery store?
Yes, but check the grind size. Most pre-ground coffee is ground for drip machines (medium-fine), which will over-extract and clog your filter. Look for coarse-ground or “French press” grind specifically. If your grocery store only has standard pre-ground, it’ll still work – just steep closer to 12 hours instead of 24 and expect a slightly bitter edge.
Why does my cold brew taste sour?
Sour = under-extracted. The water didn’t pull enough out of the grounds. Steep longer (18-24 hours), use room-temperature water instead of fridge-cold, or grind slightly finer. Fix one variable at a time so you know what worked.
Can I reuse the grounds for a second batch?
Technically yes, but the second batch will be thin, weak, and sad. Most of the soluble coffee compounds extract in the first 12-24 hours. A “second steep” pulls out maybe 20% of the flavor. Compost the grounds instead.
Do I really need to weigh my coffee and water?
For your first batch? Yes. A cheap kitchen scale is $12 and eliminates the biggest variable in coffee brewing. Once you know what 1:4 looks like in your container, you can eyeball future batches. But batch one should be measured.
Cold brew vs. iced coffee – what’s the actual difference?
Iced coffee is hot-brewed coffee poured over ice. It’s made in 5 minutes. It tastes like cooled-down hot coffee – acidic, bright, sometimes bitter when the ice melts and waters it down.
Cold brew is never heated. It’s steeped 12-24 hours in cold water. It tastes smooth, sweet, and chocolatey with almost no acidity. They’re fundamentally different drinks that happen to both be cold.
How much coffee do I need for a week’s worth of cold brew?
Depends how much you drink. Let’s say one glass per day (about 12 oz diluted): that’s roughly 4 oz of concentrate per day. Over 7 days, that’s 28 oz of concentrate. At a 1:4 ratio, you need about 200 grams of coffee (roughly half a 12-oz bag). So one full 12-oz bag of coffee makes about 2 weeks of daily cold brew.
Quick-Reference Cold Brew Recipe Card
Print this. Stick it on your fridge. Stop overthinking.
| Ratio | 1 part coffee to 4 parts water (by weight) |
| Grind | Coarse (sea salt texture) |
| Steep time | 12-24 hours at room temperature |
| Strain method | Nut milk bag, mesh strainer, or French press |
| Storage | Concentrate: 10-14 days in fridge (sealed glass) |
| Dilution | 1:1 with water or milk over ice |
That’s the whole thing. Coarse grounds. Cold water. 12 to 24 hours. Strain. Dilute. Drink.
The hardest part is waiting. The second hardest part is not drinking all of it in one day.
Now go make a batch. Your summer-self will be grateful.
Some links in this guide are affiliate links. If you buy through them, we may earn a small commission (at no extra cost to you). We only recommend gear we’ve actually used. Questions? Drop them in the comments.
Affiliate Disclosure: As an Amazon Associate, beansage.com earns from qualifying purchases. When you buy through our links, we may earn a commission at no extra cost to you. We only recommend products we stand behind.
Leave a Reply